

The Ultimate Guide to DIY Face Masks: Nourish Your Skin with Kitchen Ingredients
Introduction
In today’s fast-paced world, maintaining healthy, glowing skin can feel like an uphill battle. Harsh environmental factors, stress, and chemical-laden skincare products often leave our skin dull, dry, or irritated. However, the secret to radiant skin might already be in your kitchen. Homemade face masks, crafted from natural ingredients, offer a cost-effective, chemical-free, and customizable solution for various skin concerns.
This comprehensive guide explores the benefits of DIY face masks, the best ingredients for different skin types, step-by-step recipes, and expert tips for maximizing results. Whether you have dry, oily, acne-prone, or sensitive skin, you’ll find a nourishing mask that suits your needs—all made from pantry staples.
Why Choose DIY Face Masks?
1. Free from Harmful Chemicals
Commercial skincare products often contain parabens, sulfates, and synthetic fragrances that can irritate the skin. DIY masks use fresh, natural ingredients, reducing the risk of adverse reactions.
2. Cost-Effective Skincare
High-end skincare products can be expensive, but homemade masks utilize affordable ingredients like honey, yogurt, and oats, delivering similar (or better) results without the hefty price tag.
3. Customizable for Your Skin’s Needs
Every skin type has unique requirements. DIY masks allow you to tailor formulations based on your skin’s current condition—whether it needs hydration, exfoliation, or acne-fighting properties.
4. Eco-Friendly and Sustainable
By using organic, whole-food ingredients, you reduce packaging waste and minimize your environmental footprint.
Best Ingredients for DIY Face Masks
Before diving into recipes, it’s essential to understand which ingredients work best for different skin concerns.
For Hydration & Dry Skin
- Honey – A natural humectant that locks in moisture.
- Avocado – Rich in healthy fats and vitamins E and C.
- Yogurt – Contains lactic acid to gently hydrate and soothe.
For Oily & Acne-Prone Skin
- Bentonite Clay – Absorbs excess oil and detoxifies pores.
- Turmeric – Anti-inflammatory and antibacterial.
- Lemon Juice – A natural astringent (use sparingly to avoid irritation).
For Sensitive Skin
- Oatmeal – Calms redness and irritation.
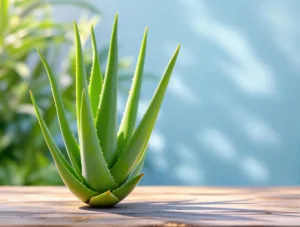
- Aloe Vera – Soothes inflammation and promotes healing.
- Cucumber – Provides a cooling effect and reduces puffiness.
For Anti-Aging & Brightening
- Papaya – Contains enzymes that exfoliate dead skin cells.
- Egg Whites – Tighten skin and reduce fine lines.
- Green Tea – Packed with antioxidants to fight free radicals.
Step-by-Step DIY Face Mask Recipes
1. Hydrating Honey & Avocado Mask
Best for: Dry, flaky skinIngredients:
- ½ ripe avocado
- 1 tbsp raw honey
- 1 tsp plain yogurt
Instructions:
- Mash the avocado until smooth.
- Mix in honey and yogurt until well combined.
- Apply to clean skin and leave on for 15–20 minutes.
- Rinse with lukewarm water and pat dry.
Benefits: Deeply moisturizes, soothes irritation, and leaves skin supple.
2. Oil-Absorbing Clay & Turmeric Mask
Best for: Oily, acne-prone skinIngredients:
- 1 tbsp bentonite clay
- ½ tsp turmeric powder
- 1 tsp apple cider vinegar (or water)
Instructions:
- Mix clay and turmeric in a non-metal bowl.
- Add apple cider vinegar slowly to form a paste.
- Apply a thin layer to the face, avoiding the eye area.
- Let it dry for 10–15 minutes, then rinse off.
Benefits: Reduces excess oil, unclogs pores, and fights acne-causing bacteria.
3. Soothing Oatmeal & Aloe Vera Mask
Best for: Sensitive or irritated skinIngredients:
- 2 tbsp finely ground oatmeal
- 1 tbsp aloe vera gel
- 1 tsp chamomile tea (cooled)
Instructions:
- Blend oatmeal into a fine powder.
- Mix with aloe vera gel and chamomile tea.
- Apply gently and leave on for 15 minutes.
- Rinse with cool water.
Benefits: Calms redness, reduces inflammation, and provides gentle exfoliation.
4. Brightening Papaya & Yogurt Mask
Best for: Dull, uneven skin toneIngredients:
- ½ cup ripe papaya (mashed)
- 1 tbsp plain yogurt
- 1 tsp honey
Instructions:
- Mash papaya into a smooth pulp.
- Stir in yogurt and honey.
- Apply to the face and leave for 10–15 minutes.
- Rinse with water and follow with moisturizer.
Benefits: Exfoliates dead skin, brightens complexion, and boosts collagen production.
Pro Tips for Maximizing Results
- Patch Test First – Always test a small amount on your wrist to check for allergies.
- Use Fresh Ingredients – Avoid storing masks for more than a day to prevent bacterial growth.
- Apply on Clean Skin – Wash your face before masking to enhance absorption.
- Follow with Moisturizer – Seal in benefits with a light moisturizer post-mask.
- Consistency is Key – Use masks 1–2 times weekly for best results.
Final Thoughts: Embrace Natural Skincare
DIY face masks are a simple yet powerful way to rejuvenate your skin without relying on synthetic products. By harnessing the power of kitchen ingredients, you can create personalized treatments that address your skin’s unique needs.
Final Tip: Start with a basic hydrating or exfoliating mask once a week, then experiment with different ingredients to find your perfect blend. Your skin—and your wallet—will thank you!
Would you like additional variations for specific skin concerns, such as dark spots or rosacea? Let us know in the comments!


Add comment